Home Made Wooden Toys
English
Română
Yesterday I talked to a dear friend of mine, and among other things she motivated me to write on the blog again, especially as Albert grows up so quickly, and us with him. Indeed, almost six months have passed since my last post, and I am sometimes surprised that my mind suddenly just begins to dictate stories for new posts, only that the last months have been quite complicated and the actual writing didn’t find its place. A few things were paused to make room for others to grow. However, yesterday's discussion motivated me to write about Albert’s gift for Christmas, a few wooden toys we created at home.
When it comes to Albert's toys, we have consciously tried to avoid anything made from plastic and other materials that could be harmful, and we are careful about what objects we bring into the house in general. And because I want for him to build a collection of miniature wooden animals, I am looking at two or three brands which produce ecological toys for children, wonderful in terms of manufacturing, but quite costly if you want to collect a few animals. As the Christmas holidays were approaching, it would have been utopian to believe that the package would arrive on time so we decided to give it a try and create some animals ourselves.
Philippe wants to play more with wood and to build things in general, and I've been dreaming of making wooden toys for a while, so it was just the right timing to start doing it. I had done research on what it means to create these kind of animals, what materials to use, and I had already bought the natural pigments for painting and the oil and beeswax for sealing. However, we still had to find the right electric saw, which had to have another important feature in addition to being useful for our creations, to fit the size of our only room with a door, the bathroom. Thus, to be a proper bath tool, as we called it.
The bathroom was basically the compromise solution so that we could start making the toys. We had a few more attempts to use the CNC we bought as a Christmas gift two years ago, we only thought to wait until we move to another home with at least one extra room, considering how it is not a good idea that all the additional sawdust would remain in the same space where we sleep, eat and live, no matter how perfectly we would use the vacuum cleaner. So when we found the option in the middle, to be using the bathroom, we did a little research on what kind of electric saw we need and where we could find a piece of oak, we brought them home and we got to work.
The not at all gentle roar of the electric saw made us turn up the music volume in the room, and find conversation partners through video calls, to not scare Albert too much, plus to politely announce our neighbours that there will be strange noises coming from our bathroom for a few hours. But we succeeded! The animals started to take shape, then they were gently sanded with a grinder attached to the end of the drill, above the toilet. Only Philippe knows what strange positions he had to use in order to bring them out to their magical form, and still keep his fingers intact.
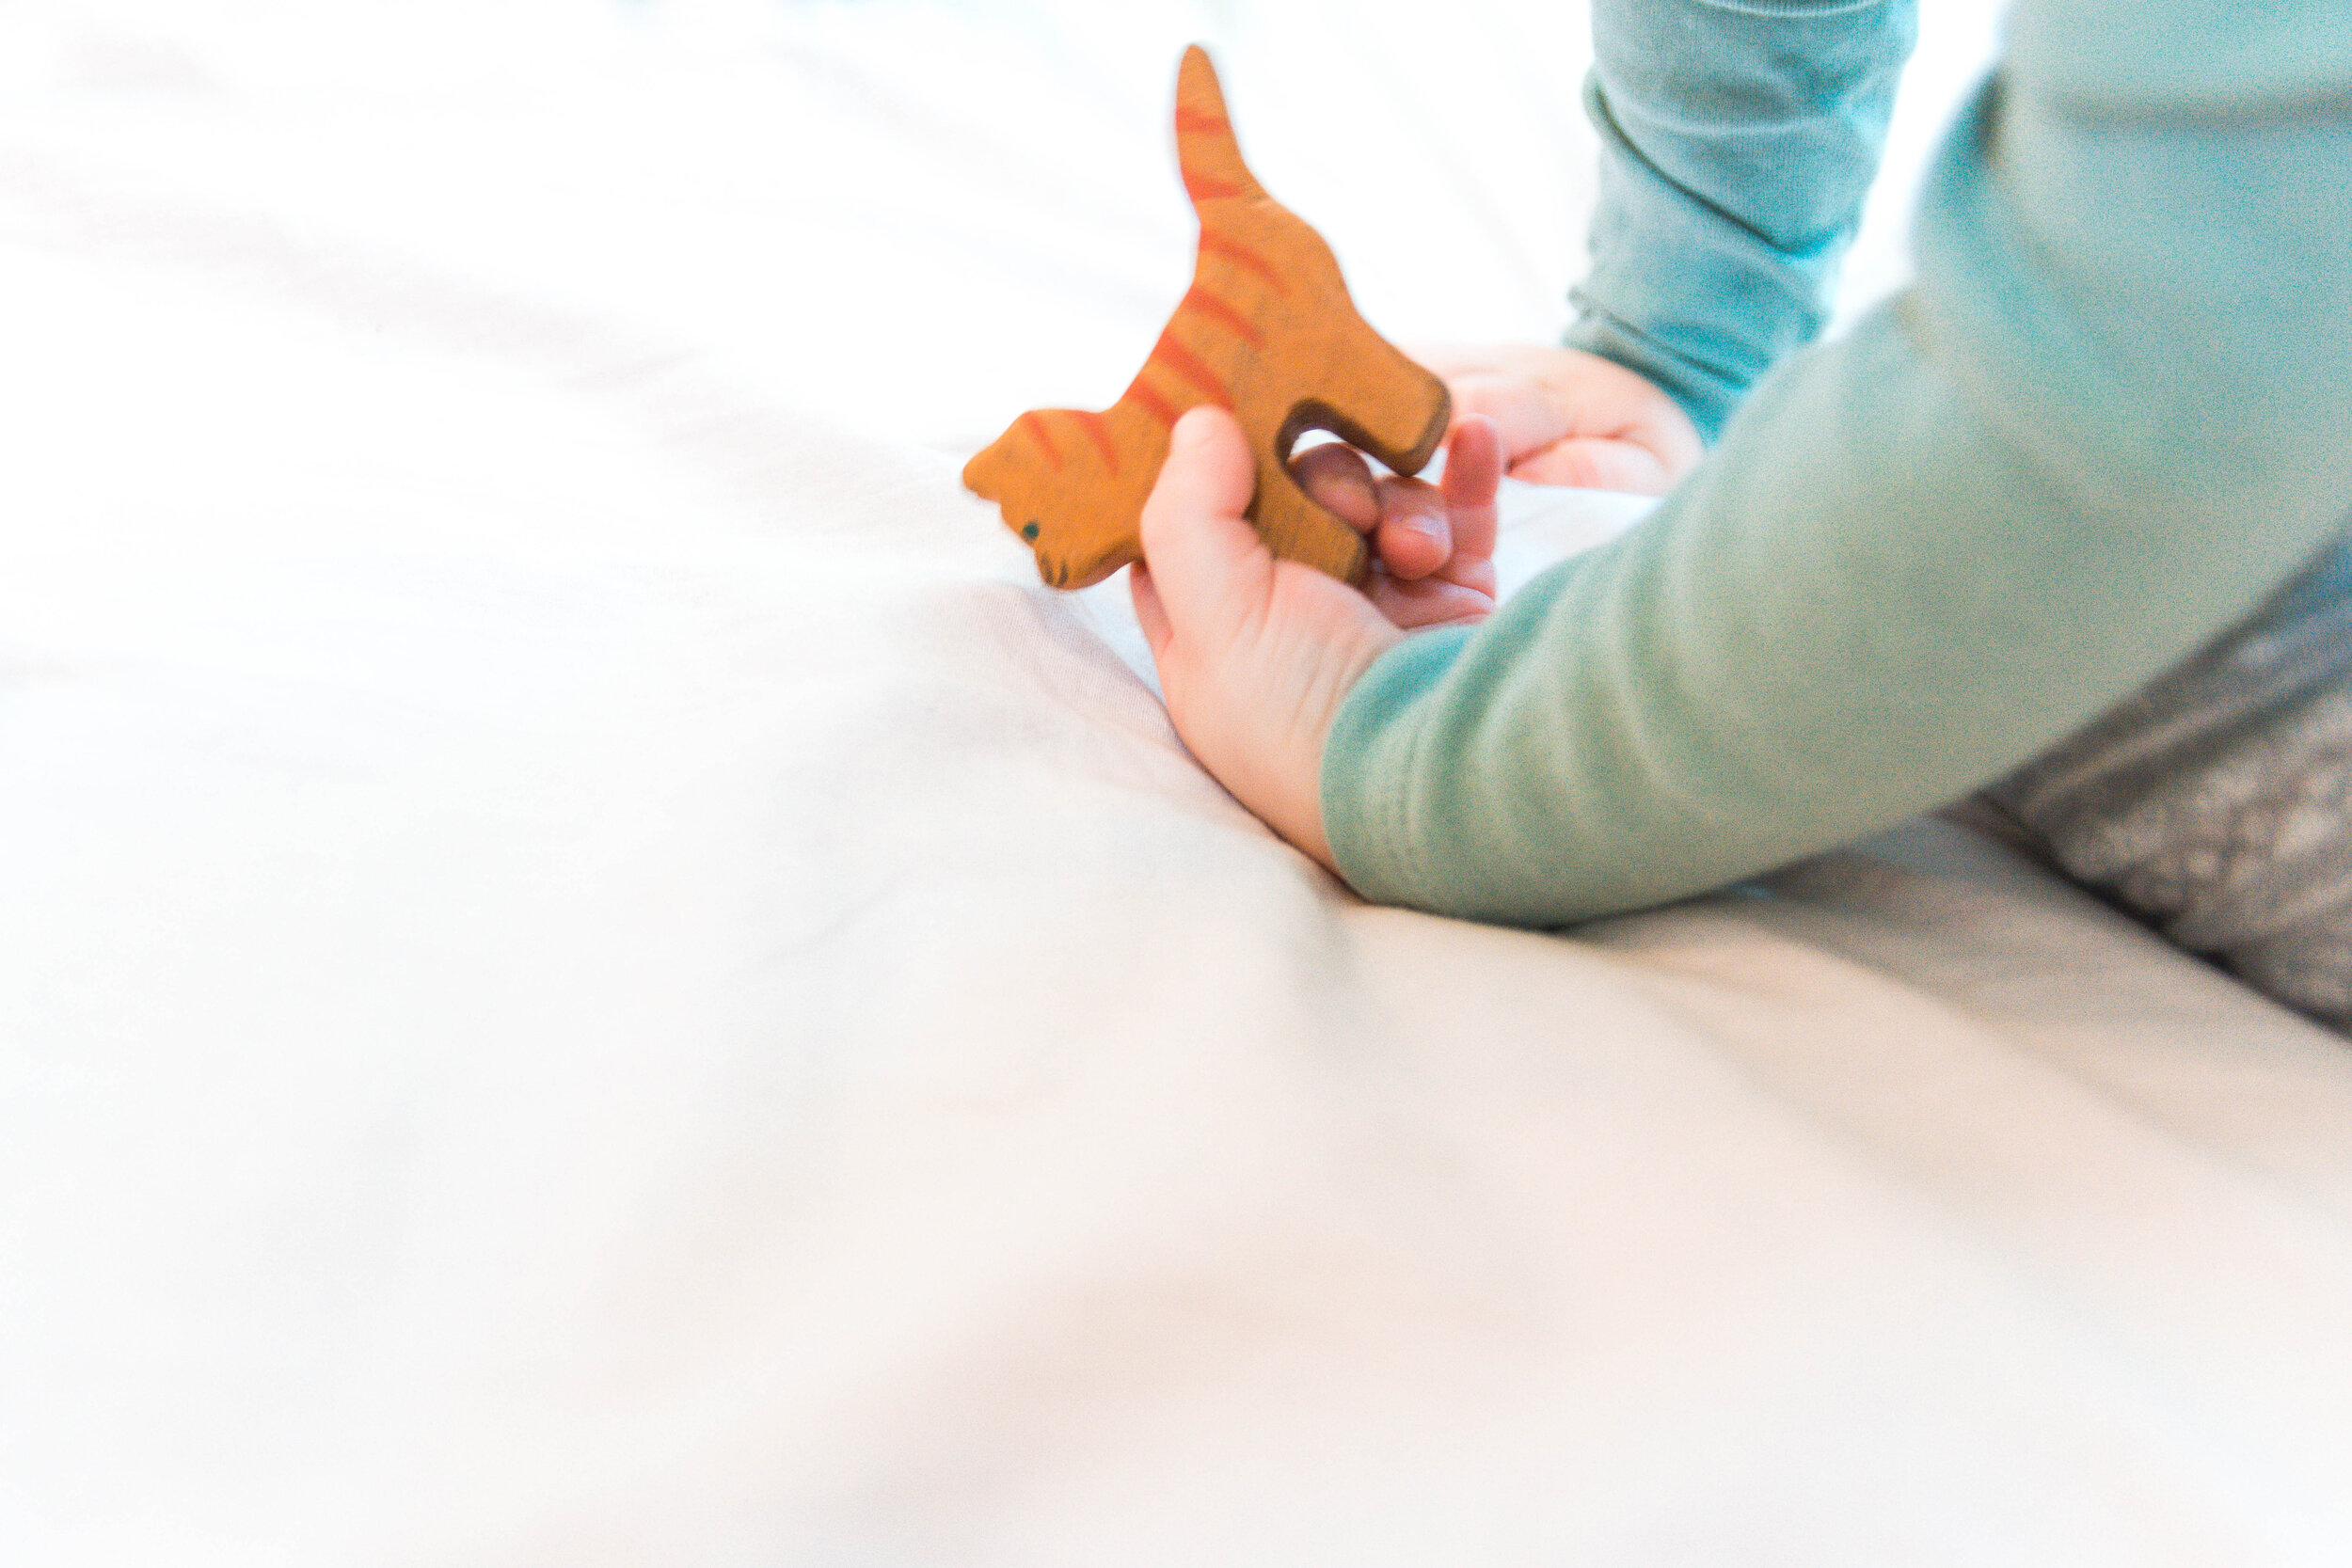
That's how five wooden animals came to life, a Saint Bernard puppy (I wanted a Bernese Mountain Dog but I didn't have the white pigment so I adapted to the colors we had in place), two cats (one made as an aunt's gift with the same appellation), a duck and a rooster. Lately, they were wiped and blown well of sawdust, and after Philippe took an purposeful shower with hot and cold water to bring the steam containing all the dust in the air, down on the floor, so we could clean our bathroom, we started the painting process. I used natural pigments, which I diluted with water and combined to get the desired colors. I had read about these pigments for a while and I bought them for both wooden toys and for Albert to safely experiment with painting, because being natural, he could play with them without worrying about chemicals he might ingest. So while I was colouring the animals, the boys were designing the next artwork to be exhibited on the wall.
It was a pretty long process, but extremely rewarding and relaxing (painting, not the sawing noises) and after Albert fell asleep, I started the alchemy of beeswax (ecologic, how else) with jojoba oil, combining them over low heat using the bain-marie process to homogenise, to be able to seal the animals with a protective layer (below I attached a link to the article that explains this process step by step). On December 23, at midnight, after the sealant had cooled, we applied it on the wood, under the candlelight (actually it was a flashlight, but it didn't sound as poetic) as not to wake our baby, and the next day they were already nicely wrapped and put under the Christmas tree.
Although he received them at Christmas, Albert started playing with the animals last month (it usually takes about 2-3 weeks to start integrating new objects into his daily activities), and now they are inseparable, especially with the cat. Yesterday there was a small drama because Meow has been caught between the bedsheets when we made the bed and she was missing all day and we couldn't find her anywhere. But she came back in the evening and brought great joy. The animals still need a few layers of sealant because they are not completely waterproof, but we are lucky that Albert has passed the chewing stage. The wax is quietly waiting for me in the fridge, ready to be applied, but as I mentioned in the beginning, my energy is low and the brain is no longer working within the optimal parameters. Until then, I see that it withstands quite well all the tests they are exposed to every day (only the dog took a bath so the color washed out a bit).
Resources:
• Types of wood suitable for creating toys:
https://www.littlebudkids.com/blogs/news/the-best-types-of-wood-for-toys
• Natural pigments for painting:
https://naturalearthpaint.com/natural-earth-paint-packets-individual/
• Preparation of wax and oil for sealing wooden toys:
https://www.amberdusick.com/woodmouse_loves_crafts/2010/07/how-to-make-beeswax-wood-polish-woodmouse-recipe.html
Yesterday I talked to a dear friend of mine, and among other things she motivated me to write on the blog again, especially as Albert grows up so quickly, and us with him. Indeed, almost six months have passed since my last post, and I am sometimes surprised that my mind suddenly just begins to dictate stories for new posts, only that the last months have been quite complicated and the actual writing didn’t find its place. A few things were paused to make room for others to grow. However, yesterday's discussion motivated me to write about Albert’s gift for Christmas, a few wooden toys we created at home.
When it comes to Albert's toys, we have consciously tried to avoid anything made from plastic and other materials that could be harmful, and we are careful about what objects we bring into the house in general. And because I want for him to build a collection of miniature wooden animals, I am looking at two or three brands which produce ecological toys for children, wonderful in terms of manufacturing, but quite costly if you want to collect a few animals. As the Christmas holidays were approaching, it would have been utopian to believe that the package would arrive on time so we decided to give it a try and create some animals ourselves.
Philippe wants to play more with wood and to build things in general, and I've been dreaming of making wooden toys for a while, so it was just the right timing to start doing it. I had done research on what it means to create these kind of animals, what materials to use, and I had already bought the natural pigments for painting and the oil and beeswax for sealing. However, we still had to find the right electric saw, which had to have another important feature in addition to being useful for our creations, to fit the size of our only room with a door, the bathroom. Thus, to be a proper bath tool, as we called it.
The bathroom was basically the compromise solution so that we could start making the toys. We had a few more attempts to use the CNC we bought as a Christmas gift two years ago, we only thought to wait until we move to another home with at least one extra room, considering how it is not a good idea that all the additional sawdust would remain in the same space where we sleep, eat and live, no matter how perfectly we would use the vacuum cleaner. So when we found the option in the middle, to be using the bathroom, we did a little research on what kind of electric saw we need and where we could find a piece of oak, we brought them home and we got to work.
The not at all gentle roar of the electric saw made us turn up the music volume in the room, and find conversation partners through video calls, to not scare Albert too much, plus to politely announce our neighbours that there will be strange noises coming from our bathroom for a few hours. But we succeeded! The animals started to take shape, then they were gently sanded with a grinder attached to the end of the drill, above the toilet. Only Philippe knows what strange positions he had to use in order to bring them out to their magical form, and still keep his fingers intact.
That's how five wooden animals came to life, a Saint Bernard puppy (I wanted a Bernese Mountain Dog but I didn't have the white pigment so I adapted to the colors we had in place), two cats (one made as an aunt's gift with the same appellation), a duck and a rooster. Lately, they were wiped and blown well of sawdust, and after Philippe took an purposeful shower with hot and cold water to bring the steam containing all the dust in the air, down on the floor, so we could clean our bathroom, we started the painting process. I used natural pigments, which I diluted with water and combined to get the desired colors. I had read about these pigments for a while and I bought them for both wooden toys and for Albert to safely experiment with painting, because being natural, he could play with them without worrying about chemicals he might ingest. So while I was colouring the animals, the boys were designing the next artwork to be exhibited on the wall.
It was a pretty long process, but extremely rewarding and relaxing (painting, not the sawing noises) and after Albert fell asleep, I started the alchemy of beeswax (ecologic, how else) with jojoba oil, combining them over low heat using the bain-marie process to homogenise, to be able to seal the animals with a protective layer (below I attached a link to the article that explains this process step by step). On December 23, at midnight, after the sealant had cooled, we applied it on the wood, under the candlelight (actually it was a flashlight, but it didn't sound as poetic) as not to wake our baby, and the next day they were already nicely wrapped and put under the Christmas tree.
Although he received them at Christmas, Albert started playing with the animals last month (it usually takes about 2-3 weeks to start integrating new objects into his daily activities), and now they are inseparable, especially with the cat. Yesterday there was a small drama because Meow has been caught between the bedsheets when we made the bed and she was missing all day and we couldn't find her anywhere. But she came back in the evening and brought great joy. The animals still need a few layers of sealant because they are not completely waterproof, but we are lucky that Albert has passed the chewing stage. The wax is quietly waiting for me in the fridge, ready to be applied, but as I mentioned in the beginning, my energy is low and the brain is no longer working within the optimal parameters. Until then, I see that it withstands quite well all the tests they are exposed to every day (only the dog took a bath so the color washed out a bit).
Resources:
• Types of wood suitable for creating toys:
https://www.littlebudkids.com/blogs/news/the-best-types-of-wood-for-toys
• Natural pigments for painting:
https://naturalearthpaint.com/natural-earth-paint-packets-individual/
• Preparation of wax and oil for sealing wooden toys:
https://www.amberdusick.com/woodmouse_loves_crafts/2010/07/how-to-make-beeswax-wood-polish-woodmouse-recipe.html